I have wanted to try out coding Android applications but didn’t have the time to do it. As my master course coming to an end soon, I decided to allocate an hour to setup the Android development environment on my Windows 7 machine.
Since Eclipse is the IDE I have used when I learnt Java 2 years ago, I decided to continue using it. You can download a copy of Eclipse from http://www.eclipse.org/downloads/. I am using the Classic version.
You will also need to have JDK installed and you can get a copy of it from http://www.oracle.com/technetwork/java/javase/downloads/index.html if you do not have one installed.
You can download a copy of the latest Android SDK from http://developer.android.com/sdk/index.html.
After downloading all the above 3 items, here is how I go about installing them.
Oracle/SUN JDK
Installing the Oracle/Sun JDK is as straightforward as just double clicking on the executable, click whatever next buttons and let it run.
Eclipse
Installing Eclipse is also fairly easy. You just need to unzip the downloaded zip file. I have unzipped it to C:\ so eclipse will end up in C:\eclipse.
Android SDK
Installing the Android SDK is quite easy as well except for the misleading “bug”. Run the executable (e.g. installer_r10-windows.exe) downloaded. Click Next on the Welcome screen and it complains that the Java SE Development Kit was not installed. Now I am very sure that it was installed.
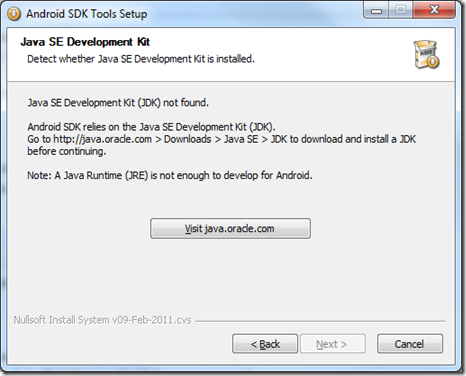
Now, click the Back button to go back to the Welcome screen and click the Next button again. Guess what, it found the missing Java SE Development Kit!

Okay, that’s the most “difficult” part to get through. The rest is next, next and install.
Download, Install and Configure ADT Plugin
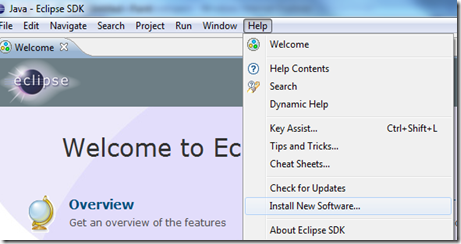
Next is to download and configure ADT plugin in eclipse. From the Help menu, click on “Install New Software…”.
Click on the “Add…” button.
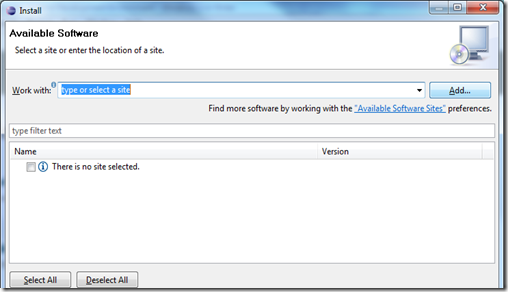
Enter a name (e.g. ADT Plugin) and enter https://dl-ssl.google.com/android/eclipse/ for the location. Click the OK button.

Select/Check “Developer Tools” and click Next to continue.
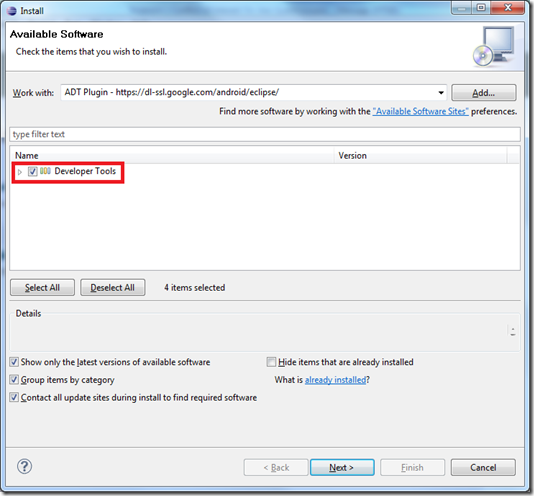
On the “Install Details” screen, just click Next.
On the “Review Licenses” screen, accept the license and click Finish.
The installation of the ADT Plugin will start.
After the plugin has been installed, you will need to restart Eclipse. After restarting Eclipse, go to the Window menu and click on Preferences.
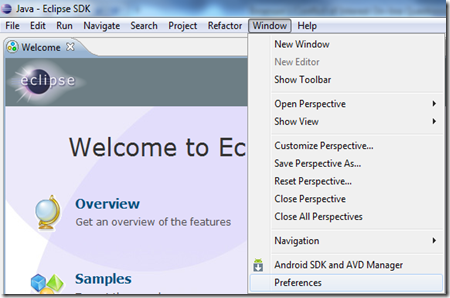
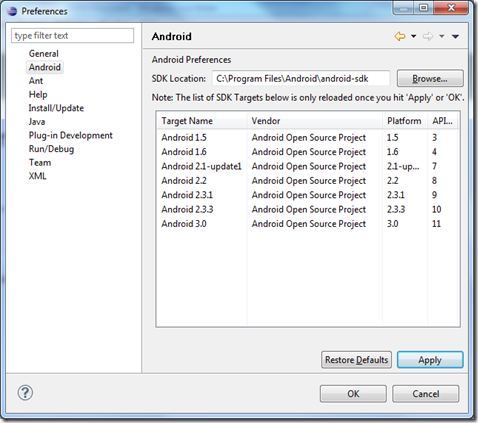
On the Preferences screen, select Android on the left pane. Click on the “Browse…” button and navigate to the folder of the Android SDK. Click on the Apply button to load the plugins. Click Ok to confirm.
That’s all for the setup and happy coding.